
In the main menu (on the left) click on “Templates” in the PRO section. In the template overview, click on the title or select a template and click on “Edit” in the Actionbar
Overview, menu and context menu explanation
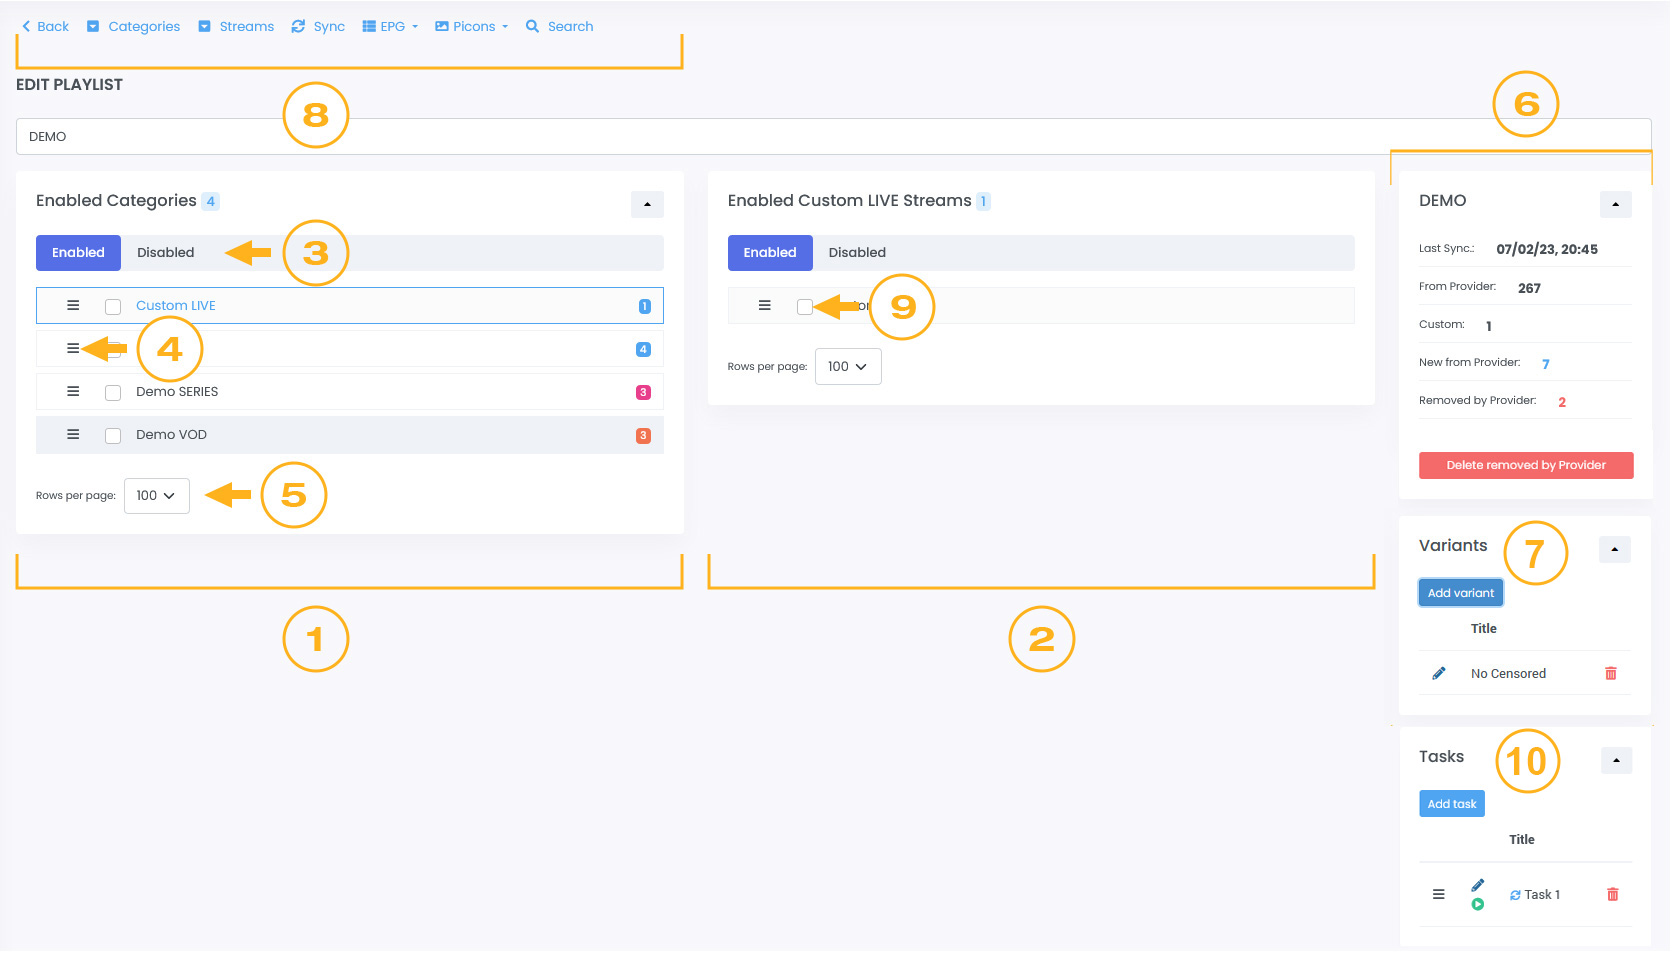
- Categories area
- Streams area
- Enabled / Disabled switches
- Drag and drop holder
- Rows per page dropdown
- Info area
- Variants area (PRO only)
- Actionbar
- Row select checkbox
- Tasks area (PRO only)
Actionbar and its dropdown

- Opens the context menu – category
- Opens the context menu – streams
- Syncs your template or playlist
- Opens the EPG-ID/TMDB assignment dropdown
- Opens the Picons dropdown
- Opens the panel for searching streams
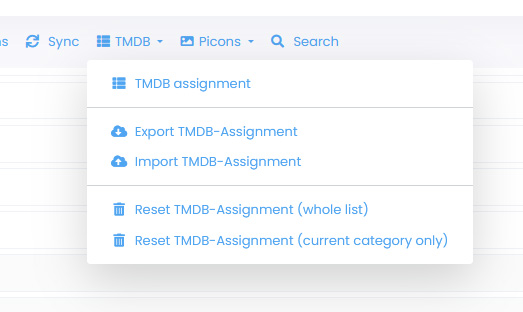
EPG-ID/TMDB assignment dropdown
Depending on the type of category (LIVE, MOVIE, SERIES) you will get an EPG-ID or TMDB assignment dropdown
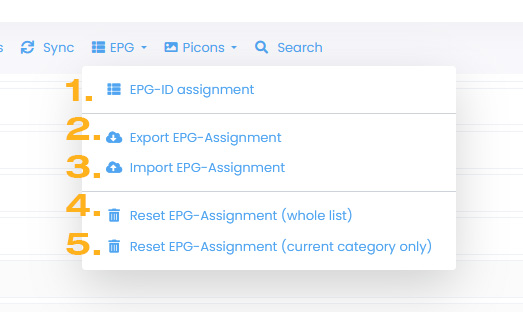
- Opens the page where you can assign EPG-ID or TMDB
- Exports the EPG-ID/TMDB assignment.
You can share the file with friends or use it as a backup - Imports an assignment file
- Resets the EPG ID assignment. You get the original from your provider (whole template or playlist)
- Resets the EPG ID assignment. You get the original from your provider (Selected category only)
Picons dropdown
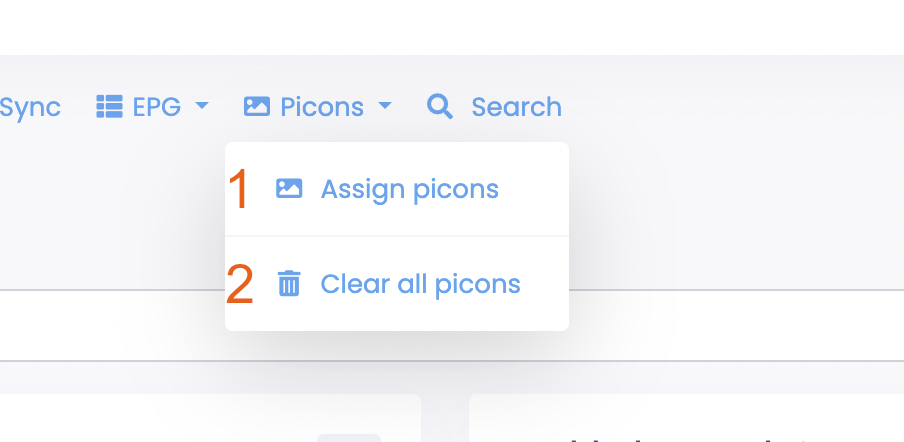
- Opens a dialog to assign picons.
- Deletes all picons in this template or playlist
Picon assignment
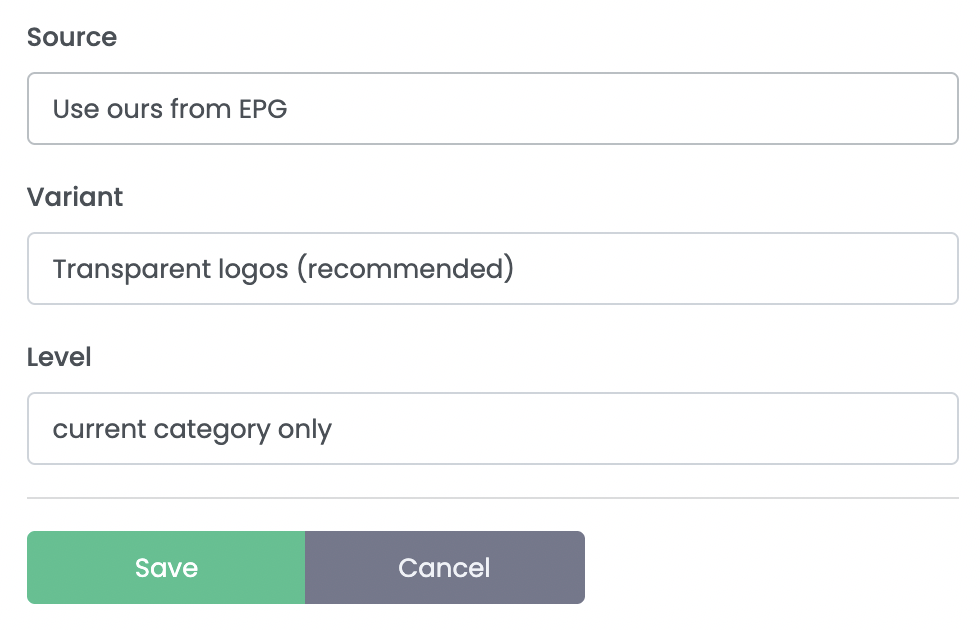
- Overrides the picon url with ours
Under “Variant” you can choose logos with a transparent or white background.
Under “Level” you define whether it is applied to the entire template/playlist or only the selected category.
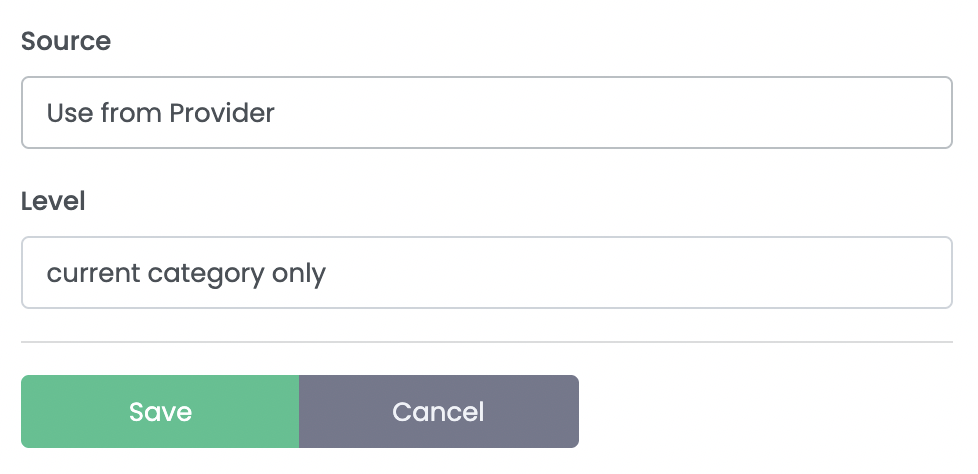
- Loads the picons from the provider
Under “Level” you define whether it is applied to the entire template/playlist or only the selected category.

- Loads the picons from the provider
Here you can define your own logo “URL”. This will be applied to every entry in the list, depending on the selected level. It will apply to the entire template/playlist or only to the category.
In the “Type” section, you can also specify which type (Live, Movies, Series) this applies to.
Under “Level” you define whether it is applied to the entire template/playlist or only the selected category.
Context menu – Categories
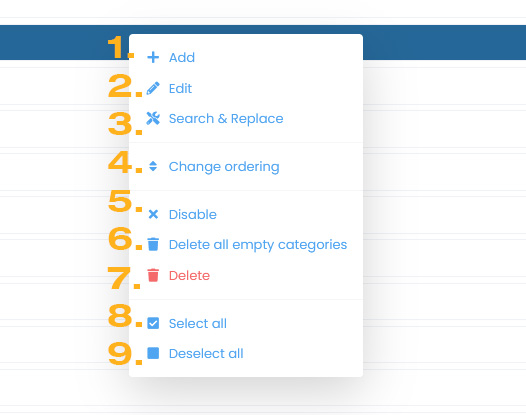
- Add your own category
- Edit selected category
- Tool to change category title
- Change the sorting
- Disable category
In the “Disabled” view, this menu item is used to reactivate the category - Delete all empty categories
- Delete selected categories
- Select all categories on this page
- Deselect all categories on this page
Context menu – Streams
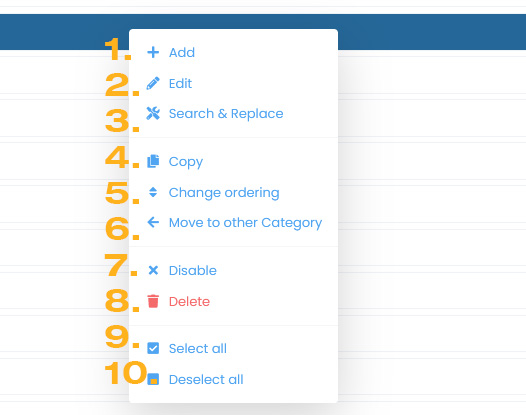
- Add your own stream
- Edit stream
- Tool to change stream title
- Copy stream
- Change the sorting of streams in this category
- Move selected streams to another or new category
- Disable stream
In the “Disabled” view, this menu item is used to reactivate the stream - Delete stream
- Select all streams on this page
- Deselect all streams on this page
Disable/enable categories or streams
The procedure is the same for categories and streams. By clicking on the row with the right mouse button, a context menu opens. You can also open the context menu via the Actionbar and the “Categories” or “Streams” button. By clicking on disable/enable you change the state. You can change the view using the Enabled / Disabled switches.
Important to know.
If you deactivate a category, the contained streams will not be loaded either.
The difference between deleting and deactivating is that deactivated categories and streams are also synchronized with the provider but are not sent to the end devices. If you delete a category or stream but the provider still offers it, it will be reloaded after the next sync and marked as new content
Add/Edit category
Selects a category and open the context menu. Click on “Add” or “Edit”. You can also open the edit panel by clicking on the title of a category.
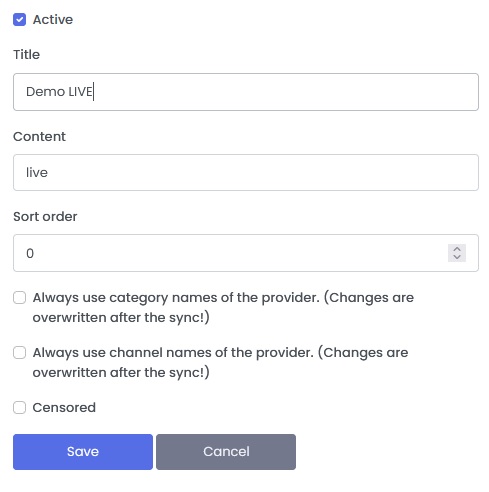
In the category edit panel you can change the following:
- Active
Enable or Disable category - Title
- Content
Content means the type of streams in this category. LIVE, MOVIE or SERIES - Sort order
Sorting of category. We recommend using the drag & drop function in the overview - Always use category names of the provider
If you activate this option, the category titles are always overwritten by the provider’s data after each synchronization. - Always use channel names of the provider
If you activate this option, the titles of the streams from this category will be overwritten by the provider’s data after each synchronization. - Censored
If you activate this option, the streams in this category are protected by the parental code
Add/Edit stream
Selects a stream and open the context menu. Click on “Add” or “Edit”. You can also open the edit panel by clicking on the title of a stream.
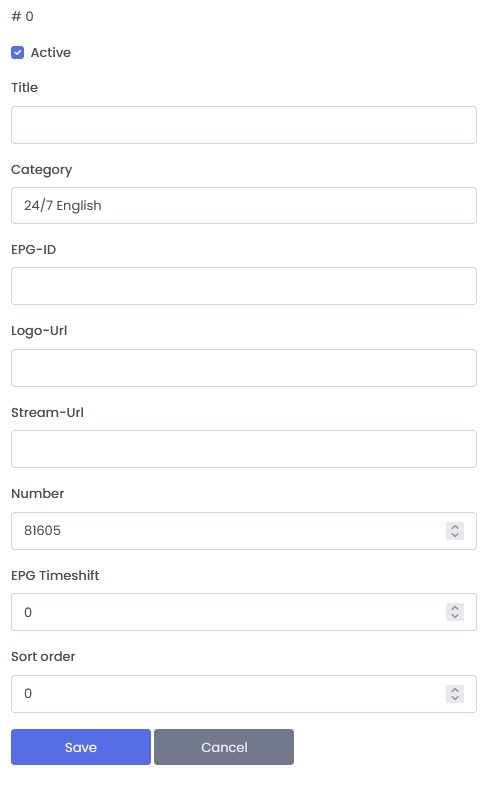
In the stream edit panel you can change the following:
- Active
Enable or Disable stream - Title
- Categorie
- EPG-ID
The EPG-ID assignment of this stream - Logo-Url
Picon Url of this stream - Stream-Url
This field is only available for M3U lists and own streams. You cannot customize this field for XC-API streams from the provider. In this field you can enter your own stream URL - Number
Channel number for the end devices. You must know that not every player has this feature - EPG Timeshift
- Sort order
Sorting of streams. We recommend using the drag & drop function in the overview
Change sorting
You can use the drag and drop handler to move categories or streams to other positions. Click and hold the mouse button on the handler (overview point 4).
Drag it to the desired location and release the mouse button.
By holding down the CTRL / SHIFT key and clicking on the handler you can mark several rows at once for moving
Move streams to other categories
Select one or more streams with the checkbox and open the context menu with the right mouse button. Click on “Move to other Category”. In the Pop-Up window select the desired category and confirm with “Save”. Check the sorting in the other category.
Tool to change category title
Select a category and open the context menu. Click on “Search & Replace”.
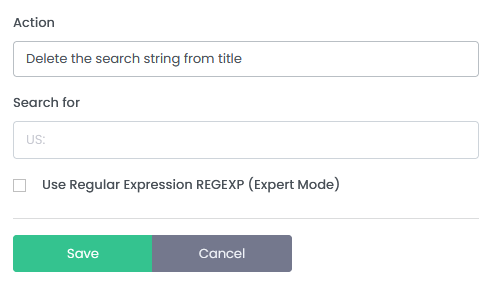
In the Pop-Up you now have the following options:
1. Delete the search string from title
2. Replace the search string from title
3. Add a prefix
4. Add a suffix
Option “Use Regular Expression REGEXP (Expert Mode)” should only be used by experienced users. Regex cannot be explained in a few sentences. More information can be found here
Tool to change stream title
Select a stream and open the context menu. Click on “Search & Replace”.
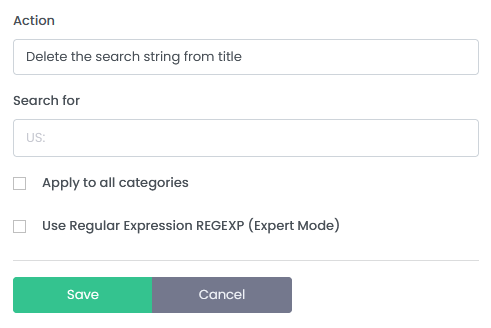
In the Pop-Up you now have the following options:
1. Delete the search string from title
2. Replace the search string from title
3. Add a prefix
4. Add a suffix
With the option “Apply to all categories” the change is applied in all streams
Option “Use Regular Expression REGEXP (Expert Mode)” should only be used by experienced users. Regex cannot be explained in a few sentences. More information can be found here
Info area
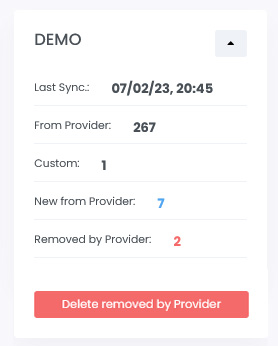
In the Info area you will find information about this template / playlist. If new streams come from the provider after synchronizing, you can click on the number next to the text “New from Provider” to find out which ones have been added. You can do the same with the streams “Removed by Provider”. The “Delete removed by Provider” button deletes these streams.
Variants area (PRO only)
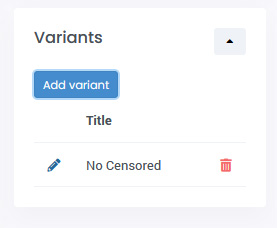
You can further customize your template to customer needs with simple modifications. With the variants you can do the following:
- No censored content
Playlists associated with this variant will not get categories that you previously marked as Censored. - Without selected categories
If you select this type, you will get a category selection. Playlists associated with this variant will not get the selected categories. - Only selected categories
If you select this type, you will get a category selection. Playlists associated with this variant only get the selected categories.
Important to know
By default, the playlists get all the content of a template. After deleting a variant, the associated playlists get the default variant (everything from the template). You should check these playlists later and, if necessary, assign a different variant!
You can define one of your variants as default so that you don’t have to explicitly select it when creating new playlists.
Tasks (PRO only)
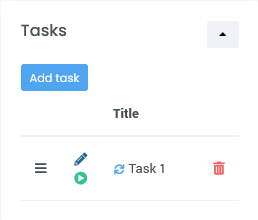
Tasks allow you to save specific functions, such as “Change ordering”, “Search & Replace”, and run them when you need them. You can also set these to run after each template sync.
Available tasks for categories:
- Change ordering
- Search and Replace
- Delete all empty categories
Available tasks for streams:
- Change ordering
- Search and Replace
For the streams, you still have to select the categories for which this task is to be performed.
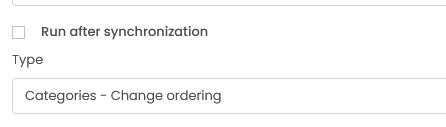
If you want the task to run on synchronization enable the “Run after synchronization” option