
A playlist in the PRO version is linked to one of your templates. The playlist is distributed to the devices and each of them should have their own credentials from the IPTV provider. You can create and distribute as many playlists as you want as long as they are still valid with us. The validity period will be paid with your credits.
Add
- Go to the “Playlist” menu in the PRO section and click on “Add” in the Actionbar
- Fill out the form and then click on “Save”
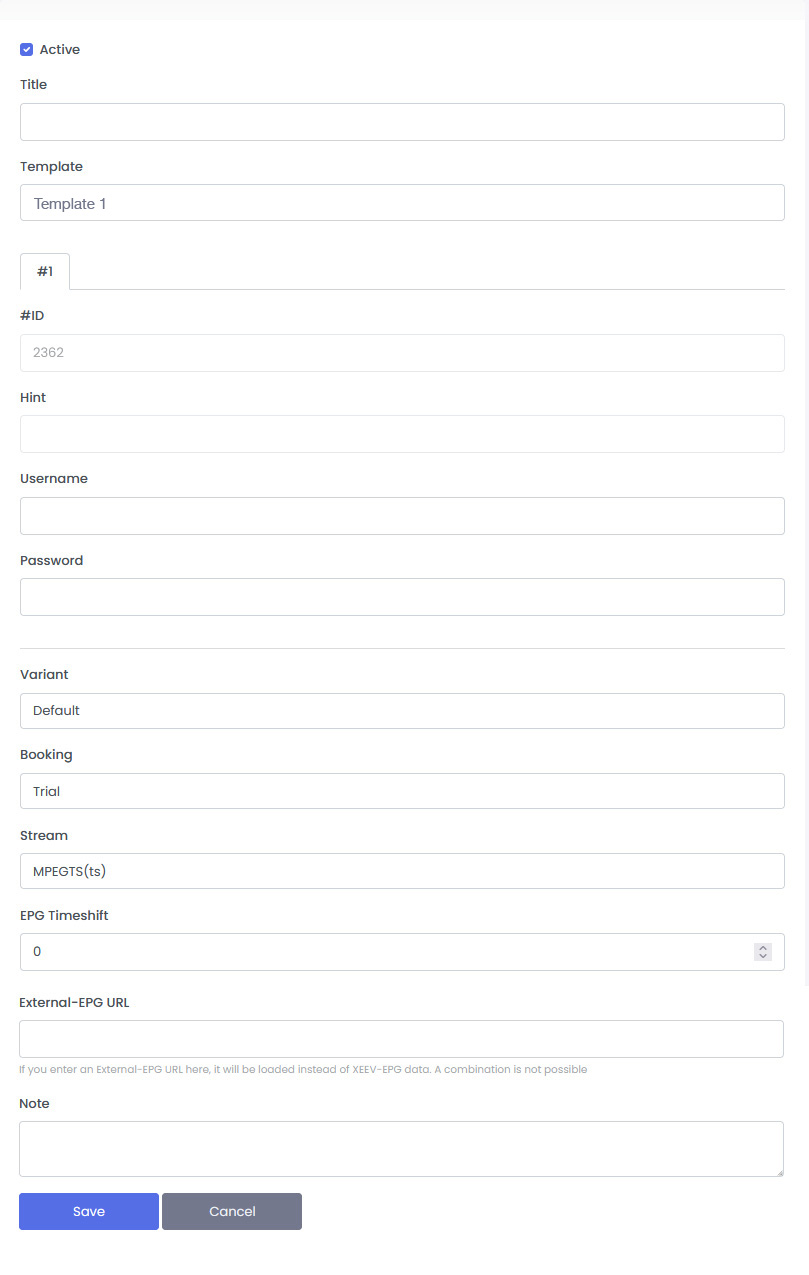
- Title
Title of your template - Template
Choose one of your templates for this playlist - #ID
Is the ID of the provider from your template. If you selected a template with multiple providers, you will need to fill out the login information for each of those providers. By clicking on the tab (#1, #2, #3) you can switch between the providers - Hint
Cannot be changed is your reference to the provider from the template - Username (XC API Playlist type only)
Username you got from your provider - Password (XC API Playlist type only)
Password you got from your provider - Variant
If your template has several variants, you should assign the desired variant to this playlist here. You can find more information about the variants in the instructions “Add / Edit template“ - Booking
Choose a period that you want to give to this playlist. The credits are automatically deducted from your account after creation. Trials are valid for 72 hours. You can also extend this playlist later. - Stream
You can choose between MPEG-TS and HLS. Information about the stream types can be found in the linked Wikipedia articles. Your IPTV provider must support this stream type for it to work - EPG Timeshift
Offsetting the EPG data for this playlist. “0” is recommended because modern players can calculate the offset automatically - External-EPG URL
If you enter an External-EPG URL here, it will be loaded instead of XEEV-EPG data. A combination is not possible - Note (optional)
Here you can enter your personal comments about this playlist
Edit
Go to the “Playlist” menu in the PRO section, select a playlist and click “Edit“ in the Actionbar
The form is almost identical to creating it. The specifics are:
- When creating a new playlist, the EPG countries are taken from the template. When editing the playlist again, you can customize the EPG countries.
- In the Action area you can request the expiry date of the provider again and extend the validity in the editor
- You can also add devices here. You can find more information about this in the Add/Edit device menu
Import Playlists
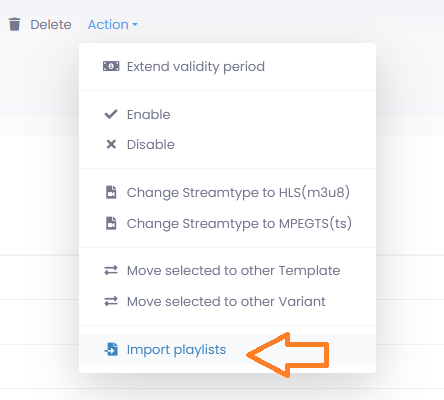
- Go to the “Playlist” menu in the PRO section and click on “Action” in the Actionbar
- Click on “Import playlists”
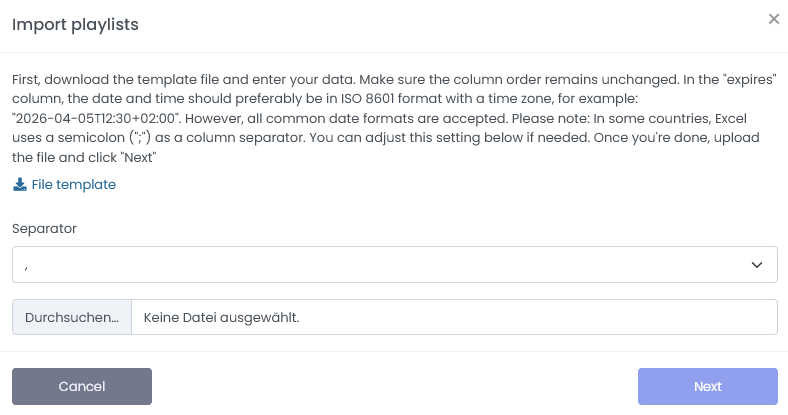
- Download the file template.
File template
Insert your data
The file should have the following columns:
All columns should remain in the file. However, the following three must be filled in
title = Title of your playlist
username = Username for the provider
password = Password for the provider
expires = Expiry date of this playlist at the provider. The date can be a Unix timestamp or any date and time format. It is important that the time zone is specified. An example of such a format is ISO 8601.
The following columns should be treated in the same way as the first three. Since a template can contain up to three different providers, these are intended for the second and third providers.
username2 (optional),
password2 (optional),
expires2 (optional),
username3 (optional),
password3 (optional),
expires3 (optional)
The file should be in a valid CSV format. CSV files are typically edited in Microsoft Excel. In some countries, a semicolon is used as the separator instead of a comma. This is not a problem for import. You should specify the separator during the upload. In our file template, a comma was used as the separator.
- Upload the finished file again, select the separator and click Next
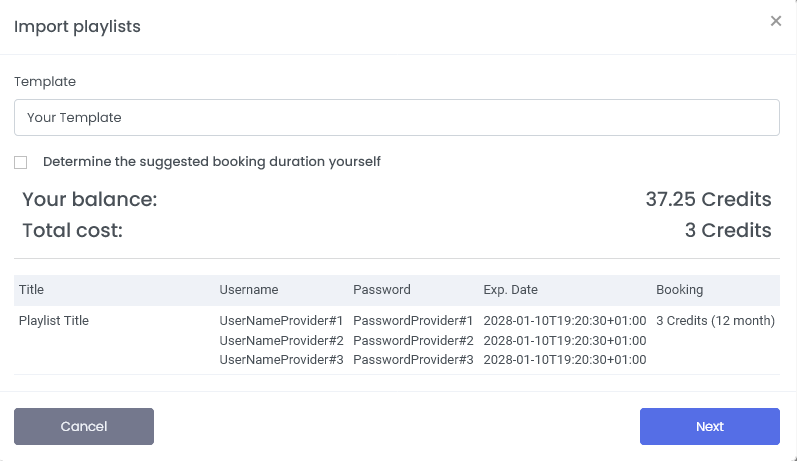
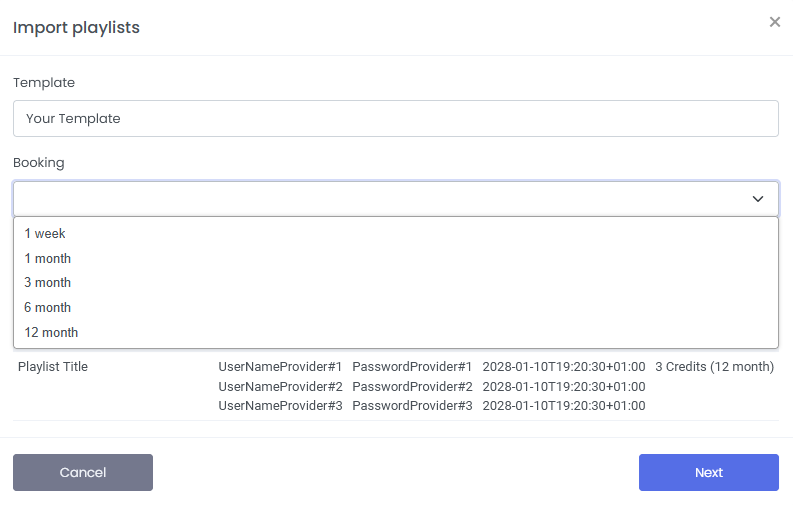
Now you’ll see the contents of your file again for review. Select the template to be used for these playlists. The booking will be determined based on the expiration date of the first provider. Our system calculates the closest suitable one. You can also determine this yourself for all entries. Click “Determine the suggested booking duration yourself.” If you choose to do so, you can specify the duration for which these playlists should be valid in our system. The costs will be automatically deducted from your account after import.
When you are ready, click “Next” and the playlists will be imported.