
Xeev Client is a software that helps you synchronise your templates or playlists. The web application is installed as a Docker container on your device. Prerequisite is Docker Desktop or Docker Engine. “Docker” is a containerisation technology that allows you to create and use Linux containers. For more information about Docker, see the link below.
https://www.docker.com/resources/what-container/
The Xeev client is not mandatory to use our online service. If you are happy with the synchronisation with your IPTV provider, you do not need to do anything.
It is intended for clients who have problems with synchronisation. Some providers only allow access to the API from certain countries. With the Xeev client, your template/playlist from your home network is synchronised and sent to our server for updating.
Also, with this software you can synchronise your template/playlist much more often. The software is able to check for changes at the IPTV provider every 15 minutes and send them to our server.
This works as follows:
- Xeev Client downloads the data from the IPTV provider to your device in the home network.
- Xeev Client loads the data from the Xeev Playlist Editor to your device in the home network.
- Xeev Client searches for changes.
- If there are new, changed or deleted entries, this is sent to Xeev Playlist Editor.
1. Docker Installation
You can install Docker Desktop or Docker Engine on Windows, Mac and Linux (NAS, Rasperry Pi, etc.), among others. Here you can find the official instructions
2a. Xeev Client Installation (Docker-Desktop)
You must first install Docker Desktop!! Open Docker Desktop afterwards.
1. Click in the search box and type in “xeev_client”
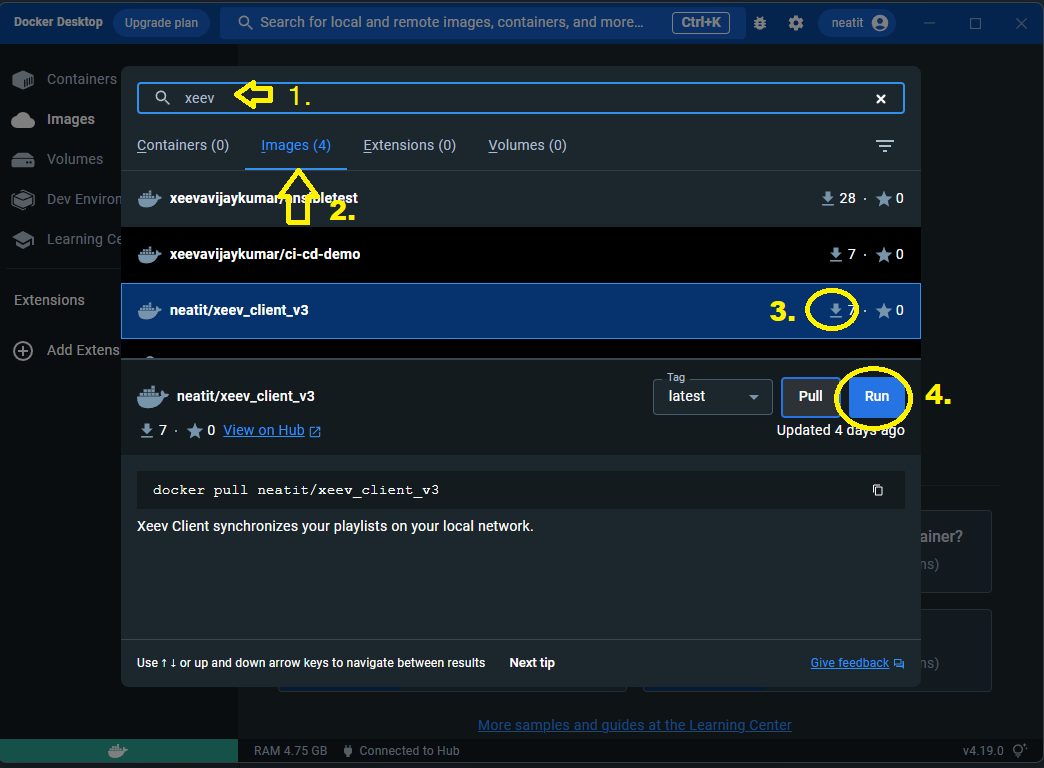
2. Select the tab “Images” and search for “neatit/xeev_client_v3” in the list.
3. Click on the download symbol
4. Click the “Run” button
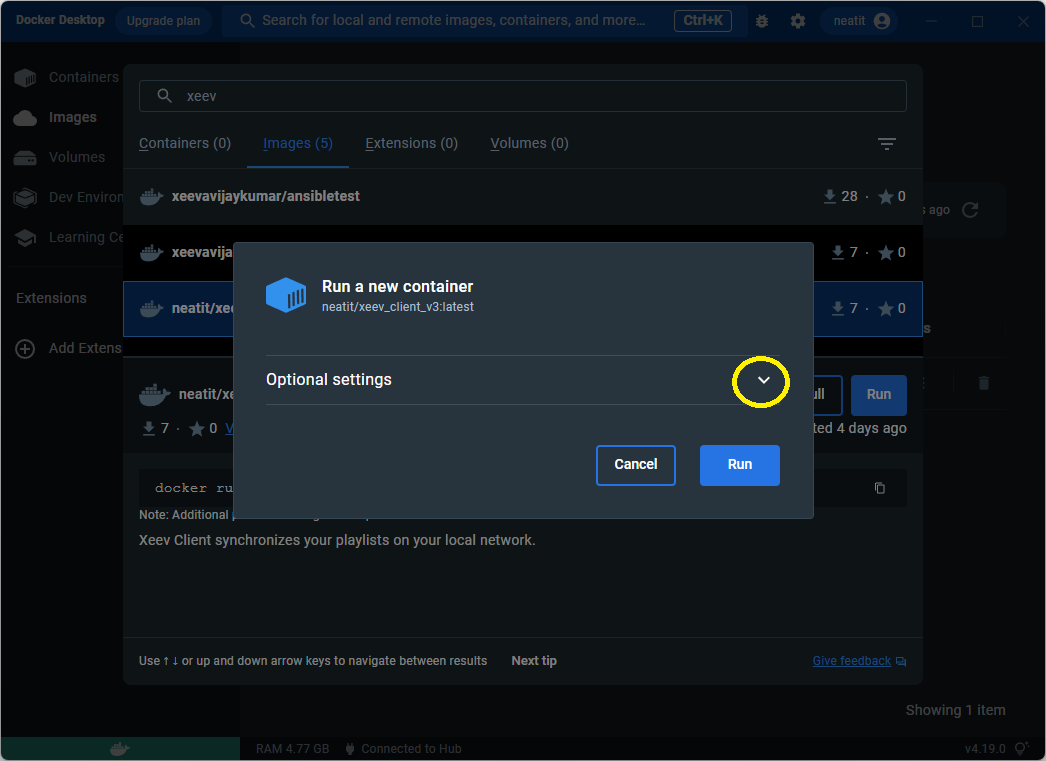
Click Optional Settings
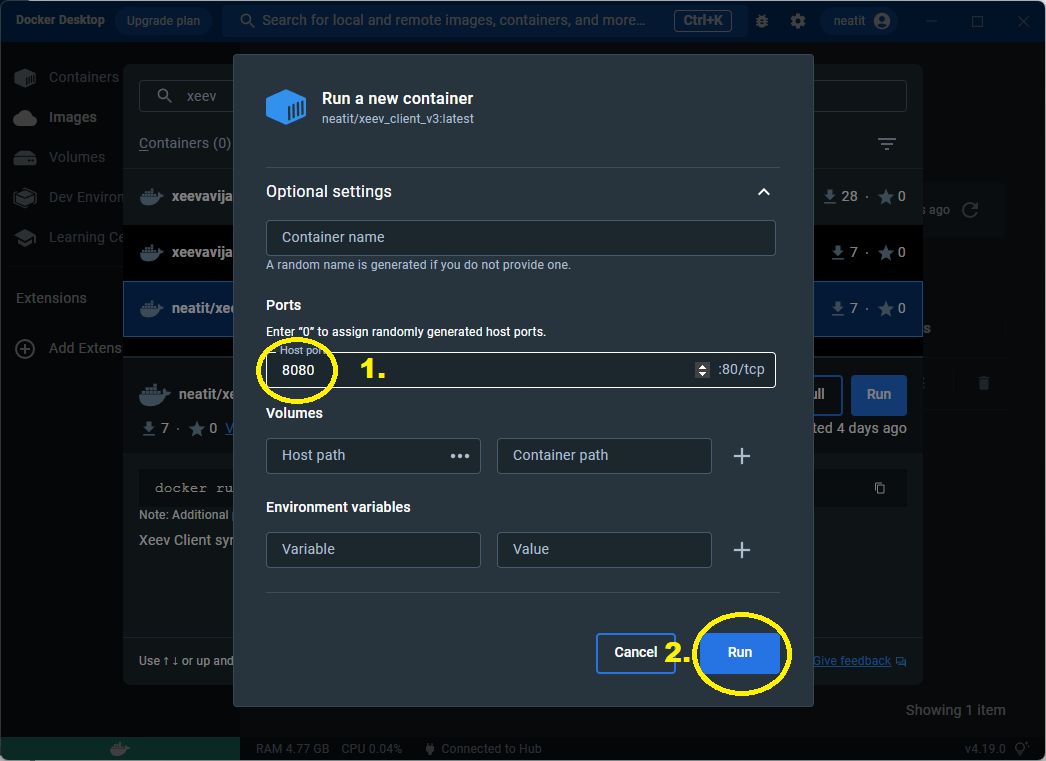
1. Select a free port here. You can also leave this field empty. Docker Desktop will set a random free port
2. Click “Run”
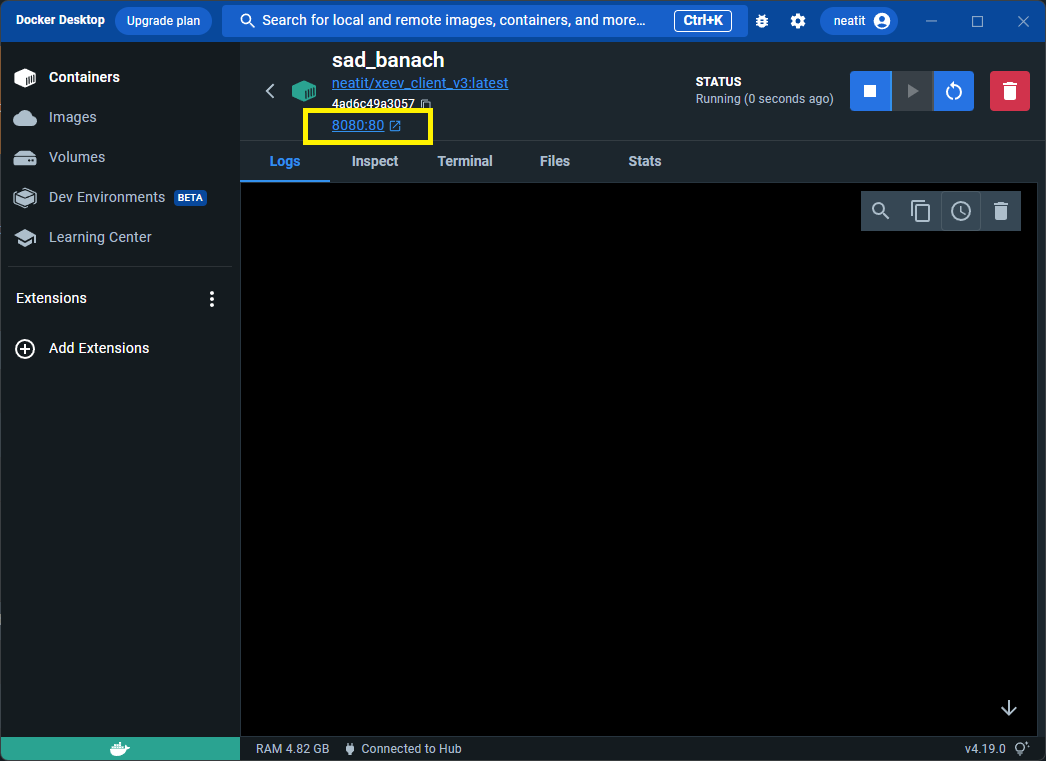
If you have done everything correctly, the container is installed and ready for use. You can now visit the following page in your browser: http://localhost:8080. Replace the port 8080 with the one you set before. You can also click on the link in the Docker Desktop. See image below.
2b. Xeev Client Installation (Docker-Engine)
You must first install Docker Engine!!
Execute the following command in the SSH console of your device:
docker run -d --restart unless-stopped -p 8080:80 neatit/xeev_client_v3:latest The TAG “latest” is intended for amd64 architectures. If you use Rasperry Pi as your device, you should choose arm32 tag here. In this example we have used port 8080. You can determine this yourself. For example, if you want to use 88 as the port, the command would be “-p 88:80“.
Here is an example for Rasperry Pi 4 with ARM chip and Port 88
docker run -d --restart unless-stopped -p 88:80 neatit/xeev_client_v3:arm32List of all available tags you can find here: https://hub.docker.com/r/neatit/xeev_client_v3/tags
You can then open the web application in the browser. To do this, use the IP address of your device and the port you set above. Example: The Synology NAS has the internal IP 192.168.1.100 and you have set the port 8080. The URL would then be http://192.168.1.1:8080
3. Connect Template/Playlist to Xeev Client
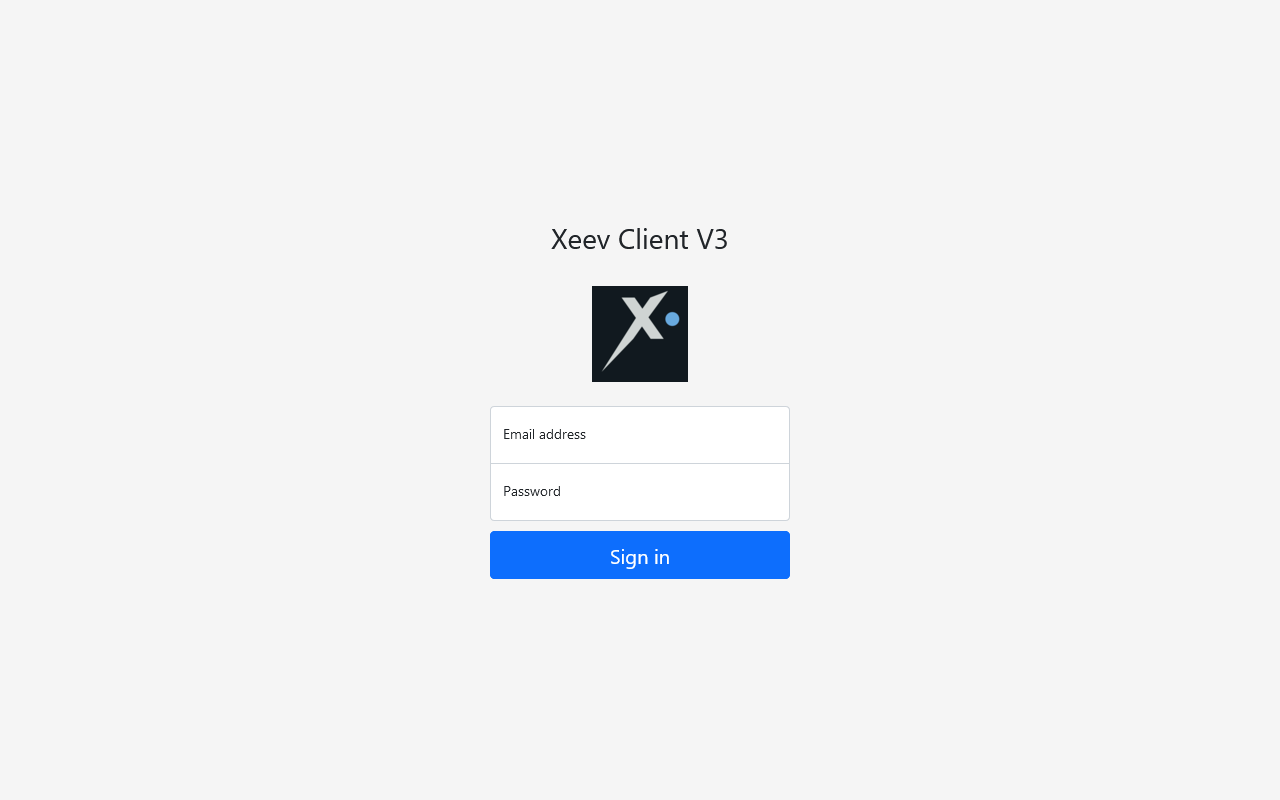
1. Open the application in your browser. And log in with the Xeev Playlist Editor (Xtream Editor) credentials.
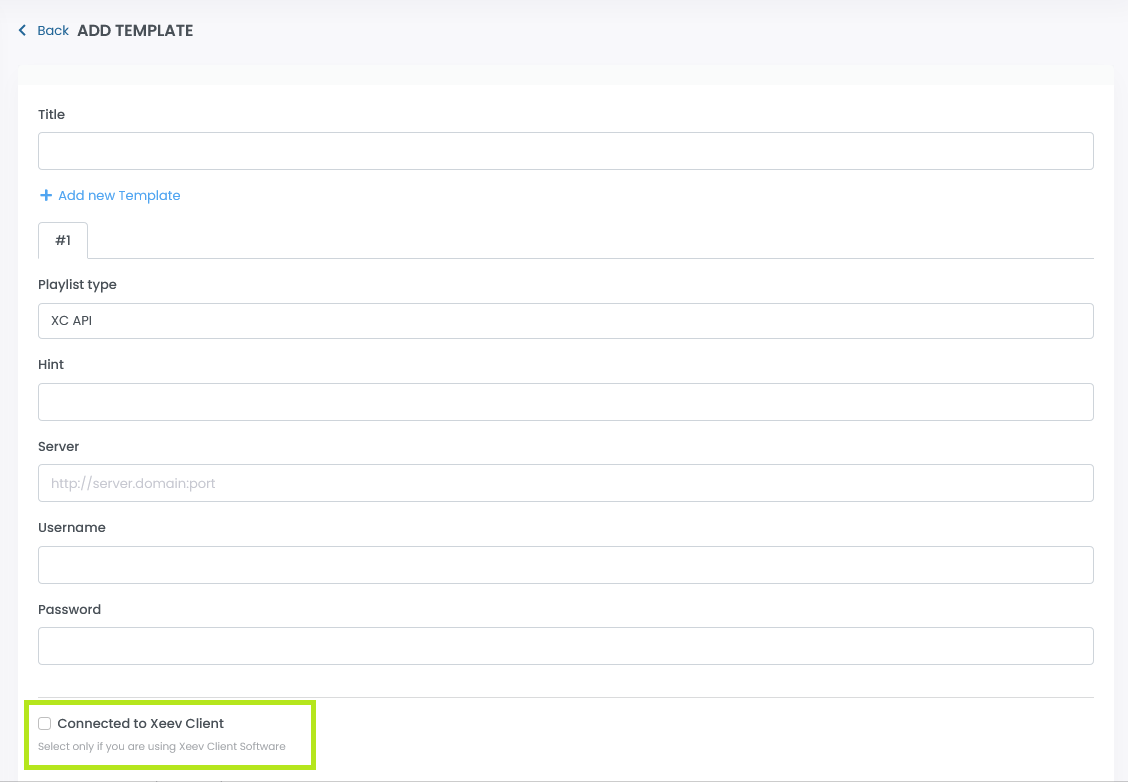
If you have not yet created the template in the online service, you can do so now. You can select the option “Connected to Xeev Client” when creating the template/playlist.
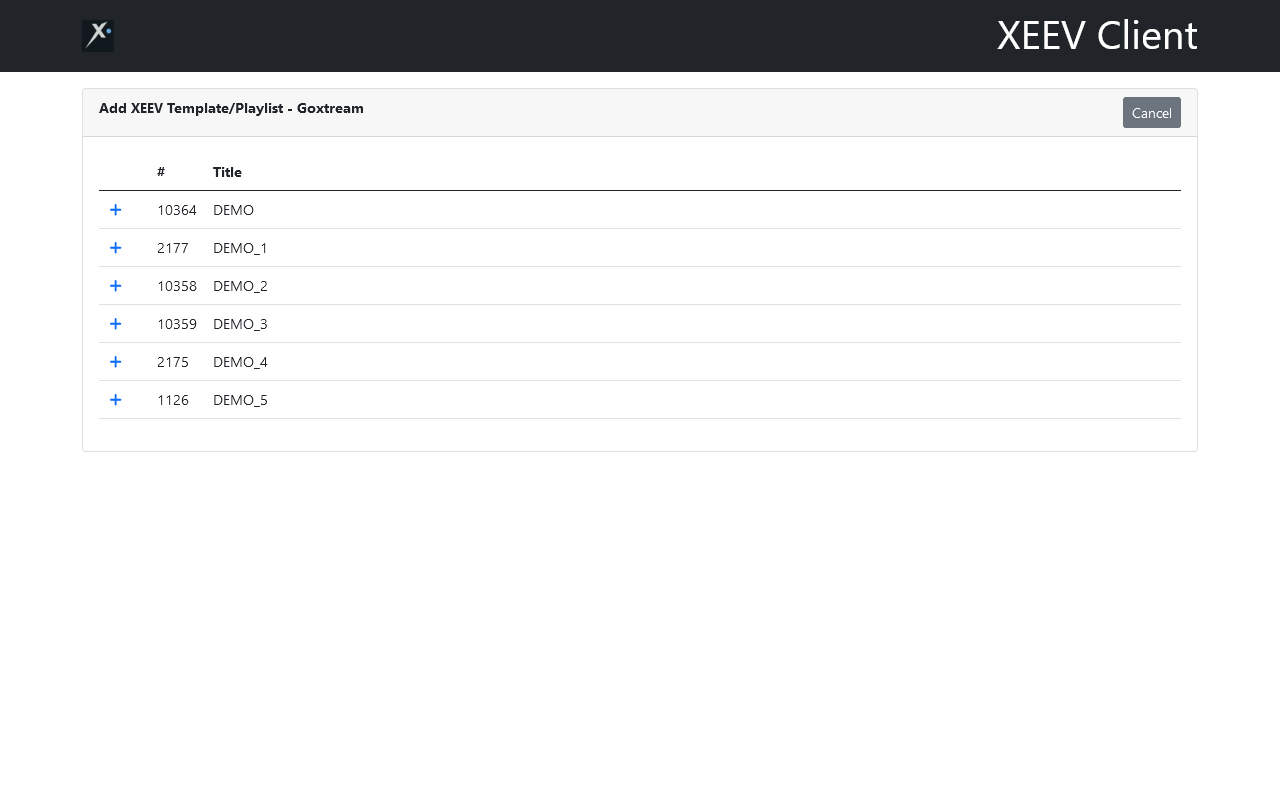
2. Click on “+Add” button
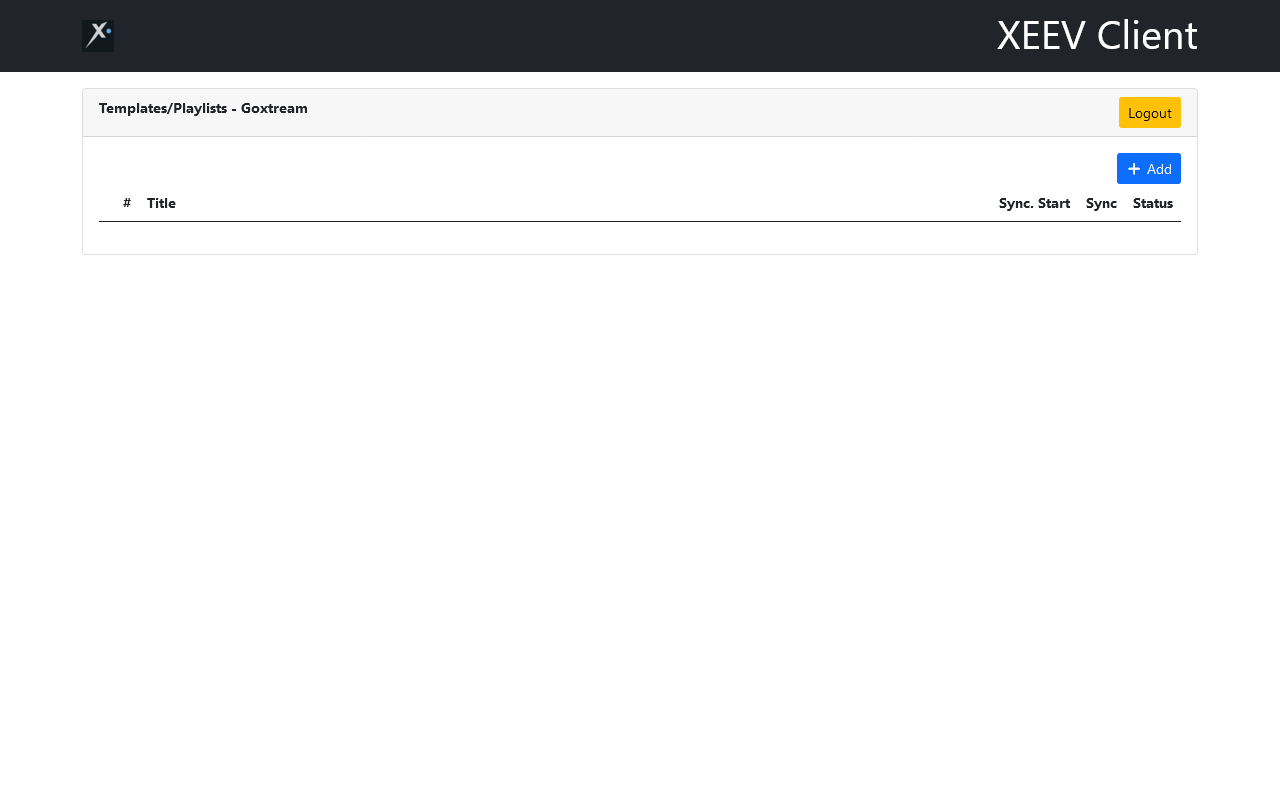
3. A list of all your templates and playlists (that are not yet connected to a Xeev client) will be displayed. Click on the plus symbol next to the title
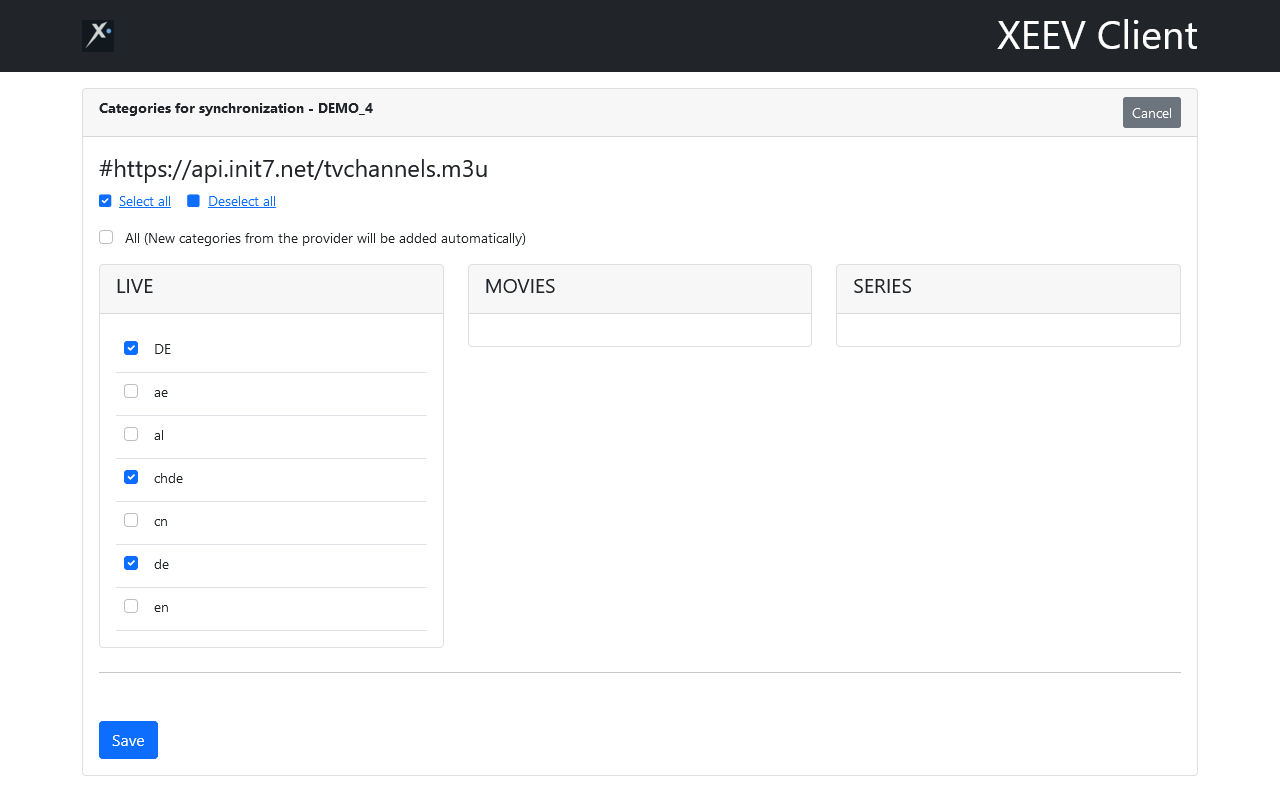
4. On this page you can select the categories for synchronisation. You already know this from our online service. You can find more information here.
Click on Save at the bottom of the page
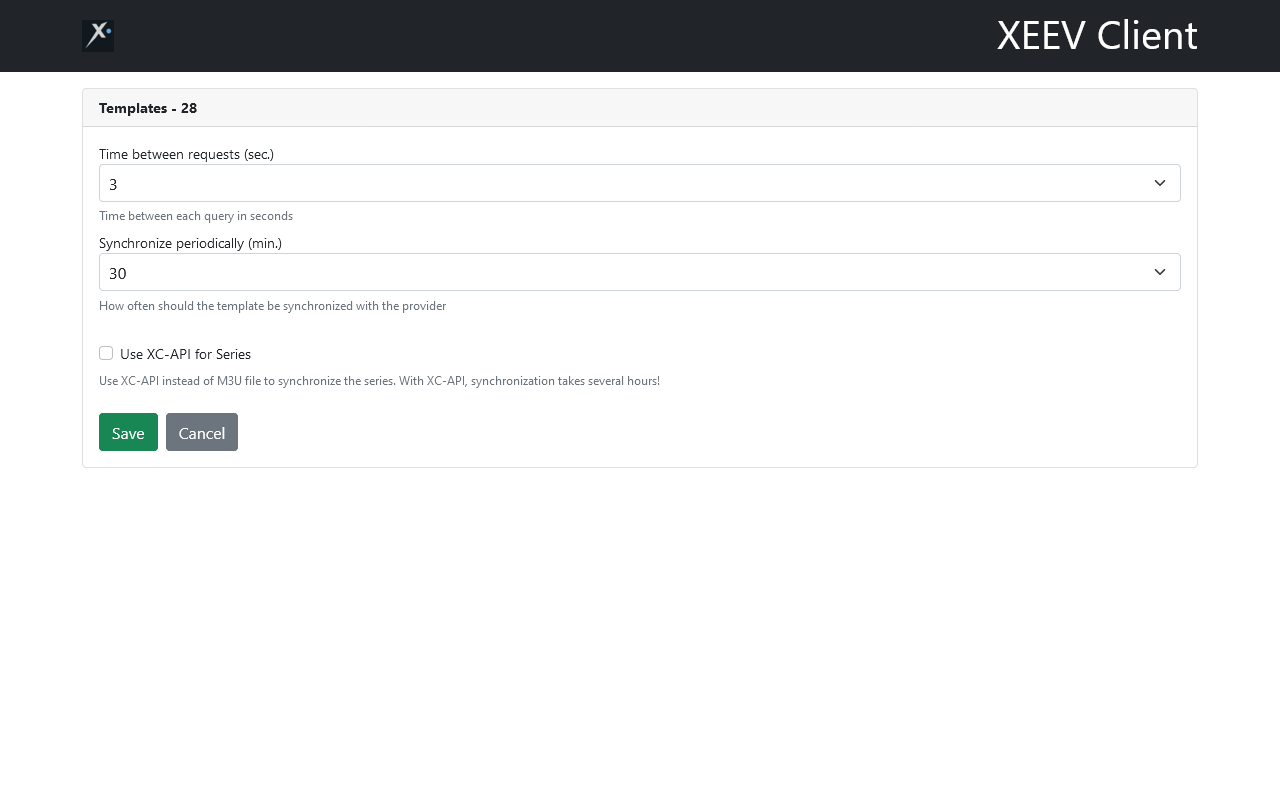
5. Define the settings for your Xeev template here. The following parameters are available:
Time between requests (sec.).
During synchronisation, many requests are sent to the provider’s server. This parameter determines the pauses between requests. You can choose between 0 and 3 seconds. A high value reduces the probability that you will be blocked by the provider’s firewall. The synchronisation will take a little longer. With a low value, the template is synchronised more quickly but increases the probability that you will be blocked.
Synchronise periodically (min.)
This parameter determines how often your template is synchronised with the provider’s server. You can choose between 15 and 120 minutes.
Use XC-API for Series
This parameter determines how the series are synchronised with the provider’s server. Without XC-API, the series are synchronised via the M3U file. This way, the template is synchronised quickly and fewer requests are made to the provider’s server. With XC-Api, each series is requested via the XC-API. This takes several hours the first time it is synchronised. How long the synchronisation takes depends on how many series your provider offers. With 1000 series and the pause between requests of 2 seconds, the synchronisation will take at least 2000 seconds (33 minutes). Try first without XC-API. If the series do not synchronise or do not synchronise as desired, activate this option.
Click on the “Save” button
6. You will now be redirected back to the home page. The template is now synchronising. You can see the progress in the “Status” column

The template is now connected to the Xeev client. It is important to know that you cannot now manually synchronise this template online. If you want to do this, open the web application again, click on the Sync icon in the line from the template. If you click the dropdown button, you will get a context menu. Here you can do the following:
Categories for synchronisation
Upload Data to Xeev
Uploads the data to the Xeev online service without prior synchronisation. Useful if you have deleted data in the online service and would like to have it back.
Upload categories to Xeev.
If you want to select the categories for synchronisation in the Xeev online service
Reset
Deletes all data from this template and reloads it from the provider
Delete
Deletes this template completely and releases it again in the online service. This template is not deleted in the online service
Disconnect Template/Playlist from Xeev Client
You can release the template by deleting it in the Xeev Client or in the Online Service by deactivating the option “Connected to Xeev Client” in the Edit Panel.
Xeev Client can contain multiple accounts. So you can also synchronise the template/playlist on your device for your friends. Simply log in with another Xeev Playlist Editor (Xtream Editor) account and connect additional templates.
Warning!
Be sure to install docker Image from our official account. Our official images are always distributed via Docker Hub and not from third parties. The image must come from this Docker Hub account:
https://hub.docker.com/u/neatit
Image path is: neatit/xeev_client_v3