
We have developed a plugin for Enigma2 devices. XE-AIO (All-in-one) includes:
- Bouquet, picons and EPG downloader
- TV Archive (Catch-Up) player
- VOD player
- VPN setup
The plug-in uploads your channel list, picon and epg to the Enigma2 box. With this plugin you can only load EPG data that comes from us. External EPG URL is not supported. In order for the EPG data to be loaded correctly, you should definitely check the EPG-ID Assignment (STANDARD, PRO). The TV-Archive player only works if your provider offers it. We don’t stream anything!
The VOD plugin uses a database to store the TMDB information. Depending on the amount of available VOD data, this database can grow up to 100 MB. It is strongly recommended to use external storage “/media/hdd” as workspace.
Please remember! None of our plugin plays the streams. We only provide the links and controls. If you have problems playing, you should define an alternative player in the XE Downloader.
INSTALLATION
Connect to your box using an SSH or Telnet client like Putty. With modern images you can use the console in the web interface. Installation scripts for the different images can be found here.
https://xeev.app/files/enigma2.txt
If you don't know which Python version is installed on your box, you can find out in the SSH Console. The command will show you the Python version.

python --version

# Python Version 2.7.x (OpenATV 6.4)
wget -O /tmp/install.sh "https://xeev.app/files/ipk/2.7.18.sh" && chmod 755 /tmp/install.sh && /tmp/install.sh

# Python Version 3.9.x (OpenATV 7.0)
wget -O /tmp/install.sh "https://xeev.app/files/ipk/3.9.5.sh" && chmod 755 /tmp/install.sh && /tmp/install.sh

# Python Version 3.10.x (OpenATV 7.1)
wget -O /tmp/install.sh "https://xeev.app/files/ipk/3.10.5.sh" && chmod 755 /tmp/install.sh && /tmp/install.sh

# Python Version 3.11.x (Openvix 6.3, OpenATV 7.2, OpenATV 7.3)
wget -O /tmp/install.sh "https://xeev.app/files/ipk/3.11.1.sh" && chmod 755 /tmp/install.sh && /tmp/install.sh

# Python Version 3.12.x (OpenATV 7.4, OpenATV 7.5)
wget -O /tmp/install.sh "https://xeev.app/files/ipk/3.12.1.sh" && chmod 755 /tmp/install.sh && /tmp/install.sh

# Python Version 3.13.x (OpenATV 7.6)
wget -O /tmp/install.sh "https://xeev.app/files/ipk/3.13.8.sh" && chmod 755 /tmp/install.sh && /tmp/install.sh

# DEB OE2.5 like DreamOS, NewNigma2
wget -O /tmp/install.sh "http://xeev.app/files/deb/install.sh" && chmod 755 /tmp/install.sh && /tmp/install.sh
PREPARE PLAYLIST
Prerequisite for a functioning EPG is the EPG-ID assignment (STANDARD, PRO)
Prerequisite for TMDB information is the TMDB-ID assignment (STANDARD, PRO)
Important Steps:
- Create a playlist
- Assign an EPG ID to the live streams
- Assign a TMDB ID to the VOD and Series streams
- Enable parental controls for categories you want (Activate the Censored option for these categories)
PREPARE ENIGMA2 BOX
- Be sure to check the date and time on your Enigma2 box. For most images, this is provided by the DVB transponder. If the date and time are wrong, no VPN connection to the server can be established and the EPG data is not loaded.
- Activate multi-bouquet. Should be found under Settings. For most distributions, this option is already set.
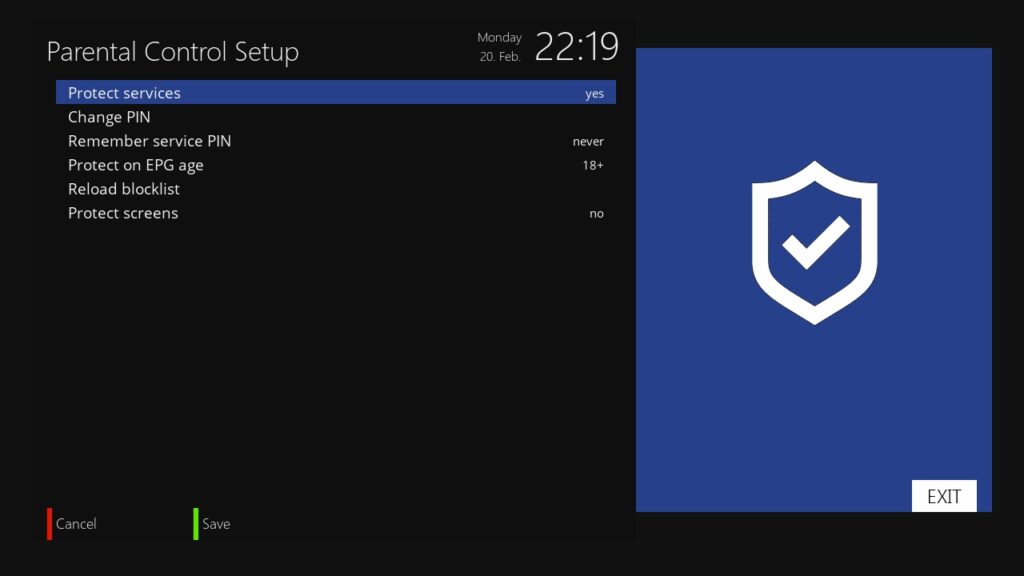
- Activate Parental Control and enter a PIN. The code from the Playlist Editor can not be imported. You must specify this directly in the box.
CONNECT PLAYLIST
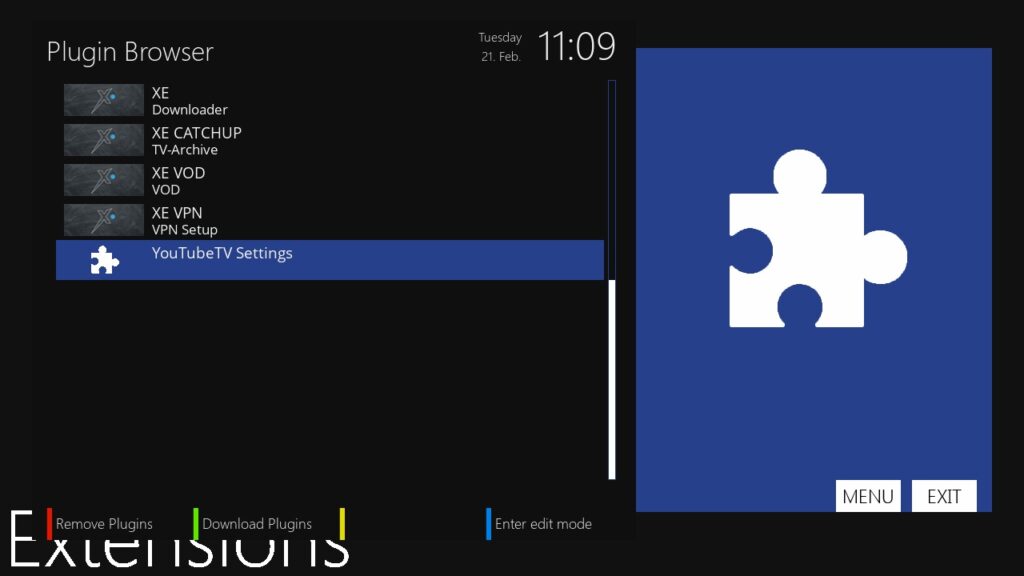
- Open the XE Downloader plug-in. You will see an 8-digit APP code.
- Link your Playlist with this code. You can find more information here (STANDARD, PRO). You can also scan the QR code and select the playlist there.
- Press YELLOW to load the configuration and the bouquets to the box. Then the plugin is now connected to your playlist.
- Press BLUE to get EPG.
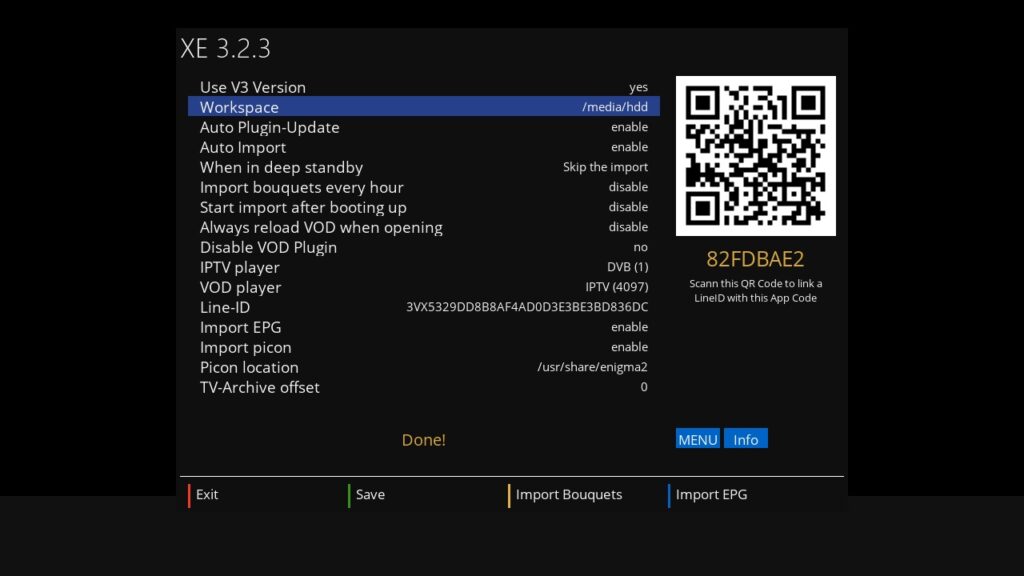
XE DOWNLOADER SETTINGS
Use V3 Version (yes,no)
Select NO here if you want to use the Legacy V2 version.
Workspace
Is the path where the plugin stores the VOD database. There, the files are also cached when loading the EPG. If you are using a USB stick as storage, make sure that it has been initialized correctly.
Auto Plugin-Update (enable, disable)
XE-AIO updates are automatically installed
Auto Import (enable, disable)
When this option is enabled, your bouquets and EPG are loaded daily at a certain time automatically.
When in deep standby (Wake up and import, Skip the import)
The automatic import can also be performed when the box is in standby. Choose “Wake up and import” there if you want. (Prerequisite Auto import)
Import bouquets every hour (enable, disable)
With this setting, the bouquets (without EPG) are loaded every hour.
Start import after booting up (enable, disable)
This setting is recommended when you turn off the box completely. Auto Import only works in standby.
Allways reload VOD when opening
If this setting is enabled, the VOD data will be updated each time the VOD plugin is opened. Depending on the amount of data and the performance of the box that may take a while. In the VOD plugin you can press the key “4” to update the data.
Disable VOD Plugin (no, yes)
This deactivates the VOD plugin. The movies and series are loaded in the bouquets.
IPTV player (DVB (1), IPTV (4097), GSTREAMER (5001), EXTEPLAYER (5002))
This setting allows you to choose which player E2 will use for your IPTV streams. The additional plugin “serviceapp” will be installed if possible.
– DVB(1) default E2 DVB player
– IPTV(4097) default E2 IPTV player
– GSTREAMER (5001) For this you need an additional plugin (Serviceapp)
– EXTEPLAYER (5002) For this you need an additional plugin (Serviceapp)
VOD player (IPTV (4097), GSTREAMER (5001), EXTEPLAYER (5002))
This setting allows you to choose which player E2 will use for your VOD and TV-Archive streams. The additional plugin “serviceapp” will be installed if possible.
– IPTV(4097) default E2 IPTV player
– GSTREAMER (5001) For this you need an additional plugin (Serviceapp)
– EXTEPLAYER (5002) For this you need an additional plugin (Serviceapp)
LineID
ID of the connected playlist in the editor
Import EPG (enable, disable)
Here you can determine if you want to load our EPG data
Import picon (enable, disable)
Here you can determine if you want to load our Picons
Picon location
Here you determine where the picons should be stored
TV-Archive offset (Catch-Up)
This is the time shift from UTC to the time zone of the provider server.
INFO Button (Button on the remote control)
You will see when the last import took place and when the next import is configured
MENU Button (Button on the remote control)
An additional menu is displayed
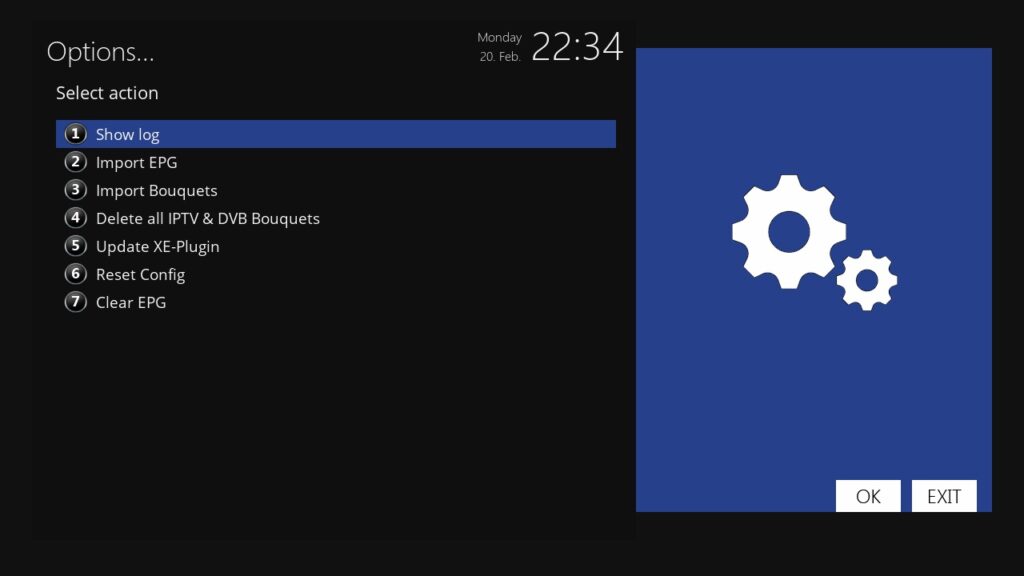
1. Show log
If you have problems with the import, you might find the reason there. Is very important for our support.
2. Import EPG
The EPG data is loaded.
3. Import Bouquets
The bouquets (without EPG data) are loaded.
4. Delete all IPTV & DVB Bouquets
This deletes all bouquets. Even those who did not create XEEV Playlist Editor. So handle it carefully.
5. Update plugin
When a new version of the plugin is released, you will receive a message after the import. You can then click MENU and select this option. The plugin will be updated automatically and the box will be restarted.
6. Reset Config
The plugin is reset. New app code is generated. Then you need to connect the code to a playlist
7. Clear EPG
The EPG.dat and cache will be deleted.
XE CATCH-UP
What is Catch-Up? Catch-Up Service is offered by many providers that uses XC server software. This gives you the opportunity to watch missed shows. Others call it TV-Archive or RePlay
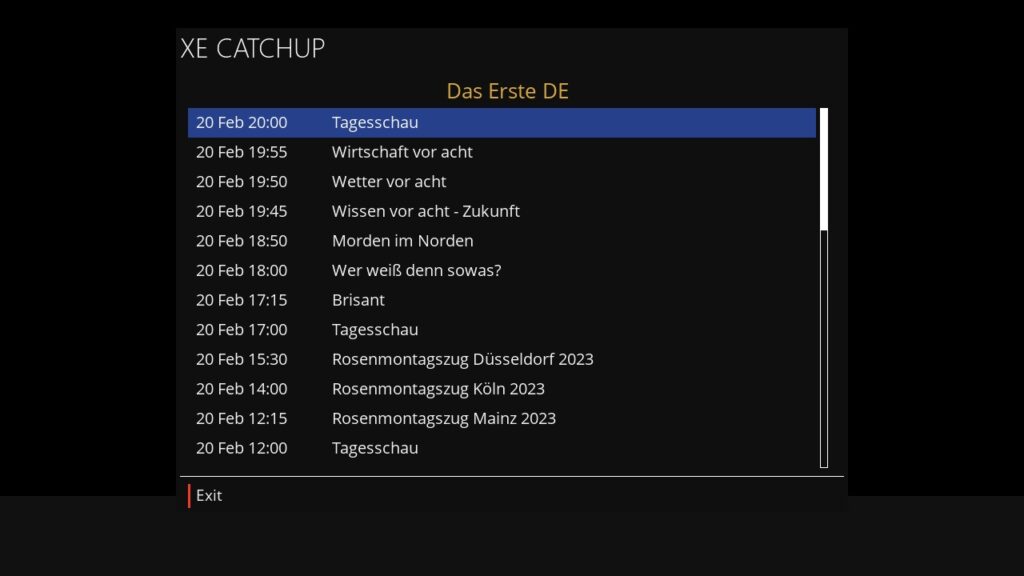
Open the plugin “XE CATCHUP” while the channel is running and support the catchup service. Channels with Catch-Up service are now marked with an “[+]” or “*” in the channel list.
Even with TV-Archive channels, our XE Media Player is used. Please read the instructions to find out how to use FFW and FRW.
TIP:
On your remote press Menu > Setup >Usage & GUI > Hotkey setup. Press red key on your remote (the key is optional but i thought red button was best) > in “Plugins” select “XE CATCHUP” > press green button to save > exit.
Now you will find when you are watching a catch-up channel if u press the red button it brings up the catch-up list
XE VOD
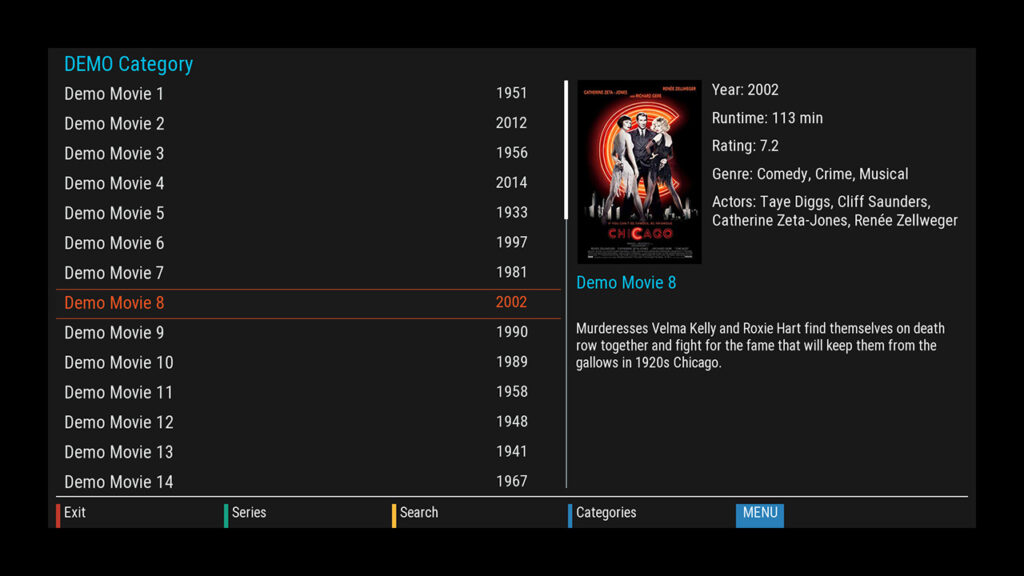
Buttons on the remote control
RED = Exit
GREEN = Change between VOD and series
YELLOW = Search (Looking for either VOD or Series in the whole range)
BLUE = Change between category and list view
1 = Sort by id (ASC / DESC)
2 = Sort by title (ASC / DESC)
3 = Sort by year (DESC / ASC) Only works if TMDB-ID has been assigned correctly
MENU = Opens Menu View
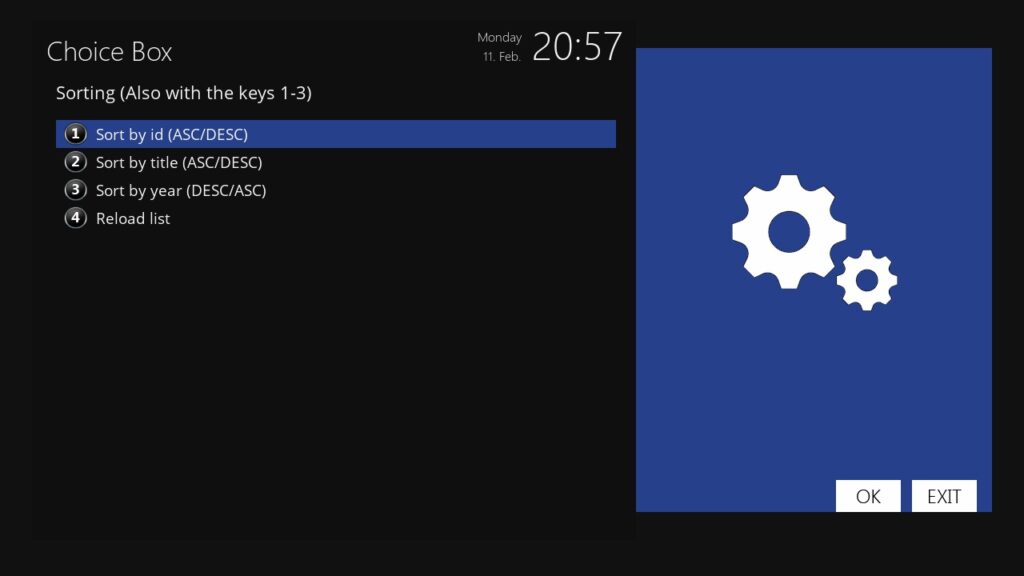
Menu – Buttons on the remote control
1 = Sort by id (ASC / DESC)
2 = Sort by title (ASC / DESC)
3 = Sort by year (DESC / ASC) Only works if IMDB ID has been assigned correctly
4 = Reload VOD & Series
XE MEDIA PLAYER
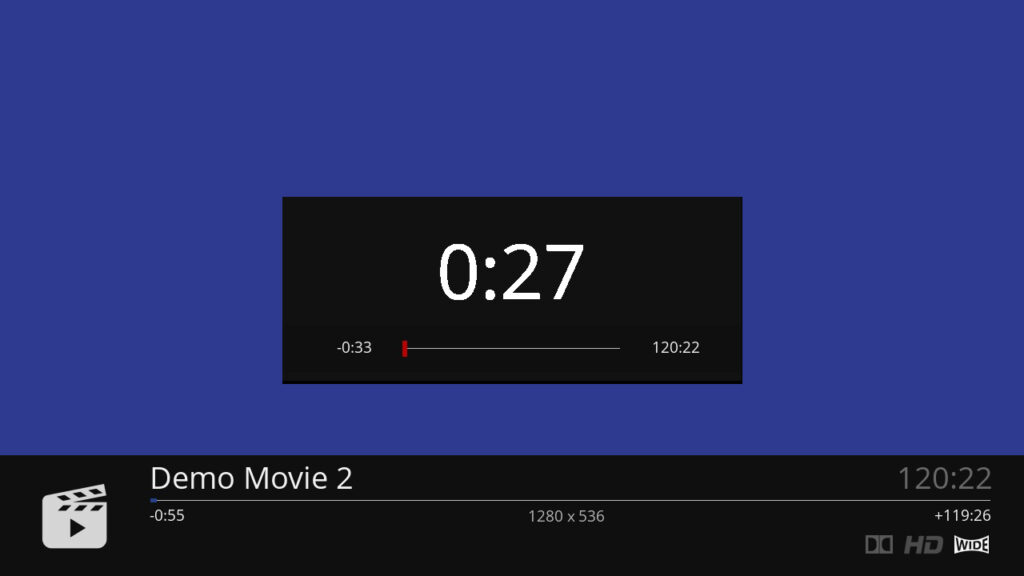
Buttons on the remote control
Function of the keys as with the standard media player.
Keys 1, 4 and 7 rewind with different jumps
Keys 3, 6 and 9 forward with different jumps
The buttons PLAY, PAUSE, STOP, FRW, FFW are identical to the standard player. Please keep in mind that not every player supports these features.
Press the LEFT or RIGHT buttons to open the Seekbar. There you can again select with the keys LEFT and RIGHT desired point and confirm with OK.
This custom media player is available for VOD and TV-Archives. Not for IPTV.
XE VPN
The VPN plugin creates a VPN connection on your Enigma2 box via your IPTV provider.
The following VPN providers are currently supported:
- Nord VPN
- IPVanish VPN
- Digibit VPN
- PIA (Private Internet Access)
- Pure VPN
- Vypr VPN
- Monster VPN
- Private VPN
The prerequisite is that you have a valid subscription to one of these providers.
Many IPTV providers block access with a VPN connection.
Please, before you buy a subscription at one of these VPN providers, inform yourself if this works for you.
The plugin is free for all XEEV Playlist Editor customers. So you need a subscription with us.
You should also know that a VPN connection may slow down the internet connection. Use Google Search to inform you. Support inquiries over slow Internet connection or similar are not answered by us. I ask for your understanding
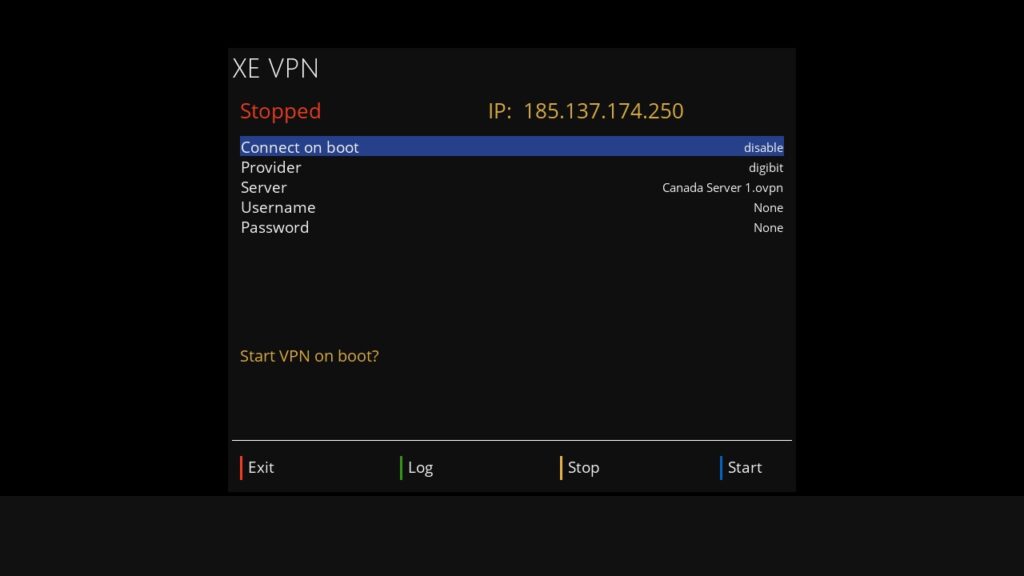
Configuration & Setup
- Open the XE VPN Setup plug-in
- Choose your VPN provider.
- Go to the “Sever” section and click “OK” on the remote. Depending on the provider, it may take a while for the first setup to show the server list. Select a VPN server there.
- Navigate with the remote control to the Username section. Click “OK” on the remote. Enter your username from your VPN provider.
- Repeat the same with the password.
- Click on the “BLUE” button on your remote.
Now our plugin tries to connect. After a few seconds, you will see the status and your IP address in the upper area. If it does not work. Click on the “GREEN” key and analyze the log. There you may find the cause of the failed connection.